Tutorial
How to set up MCP in Claude Code (a step-by-step guide, from scratch)
Connect Claude Code to your tools (GitHub, browser, database) using MCP. A simple guide, with the exact commands to copy and paste.
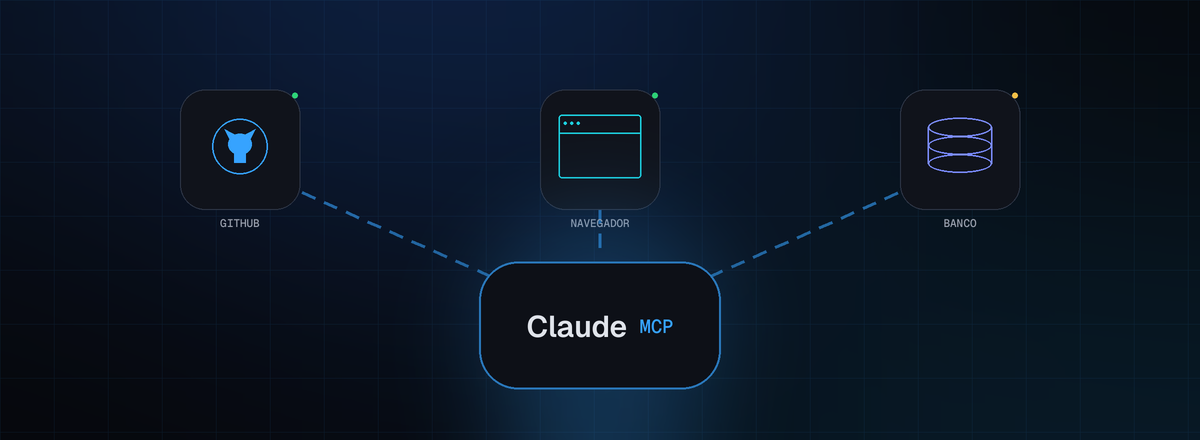
On its own, Claude Code already reads and writes files and runs commands inside your project. But the real work almost always lives in other tools. The GitHub repo that holds your code. The browser that opens your website. The database with your orders. MCP is what links Claude to all of it.
In this guide you will connect your first server in just a few minutes. You can copy and paste every command.
What MCP is, plainly
MCP stands for Model Context Protocol. It is a standard that lets Claude use external tools directly, like GitHub, Notion or the browser, without you constantly copying and pasting information back and forth.
Think of it this way. Without MCP, Claude is a brilliant employee locked in a single room. With MCP, you hand it the keys to the other rooms in the company.
Before you start
You need Claude Code installed and working in your terminal. If the command below replies with a version, you are ready to go.
claude --versionThe command that adds a server
Everything revolves around a single command. The structure is this:
claude mcp add [--scope local|project|user] [--transport http|stdio|sse] <name> <url-or-command>It looks like a lot, but in practice you only fill in three blanks. The name you give it, where it comes from, and who gets to use it. Let us take it piece by piece.
Step 1. Choose who gets to use it (the scope)
The scope decides where the configuration is saved and who can see the server. There are three.
- local (the default). It applies only to you, only in this project. Use it while you are testing.
- project. It lives in a
.mcp.jsonfile at the root of the project and goes into Git. Everyone who clones the repository gets the same server. Use it for tools the whole team needs. - user. It applies to you across every project on your machine. Use it for your own personal tools.
When two scopes define the same server, the order of priority is local, then project, then user.
Step 2. Add the server
There are three ways to connect. You do not need to memorize them, just know which example to copy.
Hosted server (HTTP)
This is a server that already runs at a URL. The most common kind today.
claude mcp add --transport http sentry https://mcp.sentry.dev/mcpLocal server (stdio)
It runs on your own machine, like a controllable browser or file access. Everything after the -- is the command Claude runs.
claude mcp add playwright -- npx -y @playwright/mcp@latestServer with events (SSE)
Less common at the start. It is meant for servers that push updates to Claude.
claude mcp add --transport sse my-webhook https://my-service.local:8000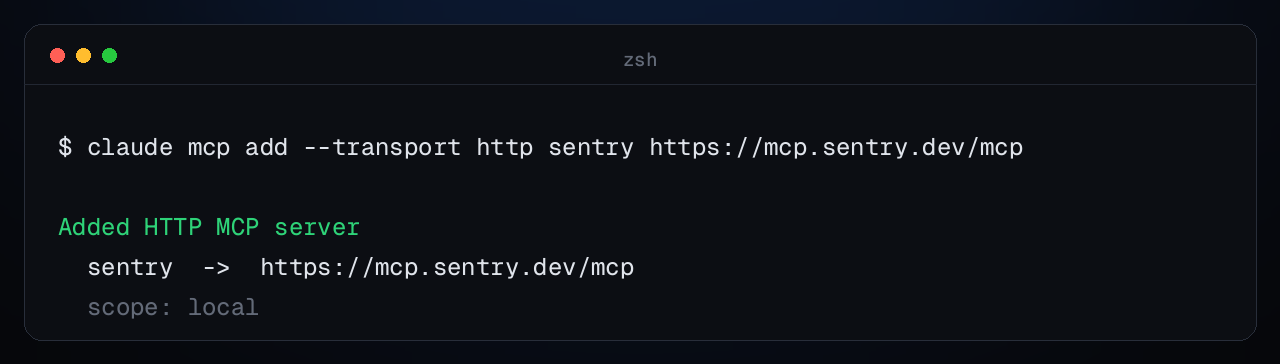
Step 3. A full, end-to-end example (GitHub)
Say you want Claude reviewing your Pull Requests on GitHub. With a GitHub access token in hand, here is the command.
claude mcp add --scope user --transport http github \
  https://mcp.github.com/mcp \
  --header "Authorization: Bearer ghp_your_token_here"
Done. From now on, in any project, you can ask:
Review the PR at github.com/mycompany/repo/pull/42And Claude can now see GitHub’s tools. Listing PRs, reading the diff, leaving comments.
Step 4. The .mcp.json file (for the whole team)
If you used the project scope, the configuration becomes a .mcp.json file at the root of the project. It has this shape.
{
  "mcpServers": {
    "github": {
      "type": "http",
      "url": "https://mcp.github.com/mcp",
      "headers": {
        "Authorization": "Bearer ghp_your_token_here"
      }
    },
    "playwright": {
      "type": "stdio",
      "command": "npx",
      "args": ["-y", "@playwright/mcp@latest"]
    }
  }
}
Because this file goes into Git, the first time someone on the team opens the project Claude asks for a quick approval. That is on purpose, so nobody runs a server without knowing.
Mind the token. Never push a real password or token to Git. On team projects, keep the token in an environment variable and reference it, instead of writing the value into the file.
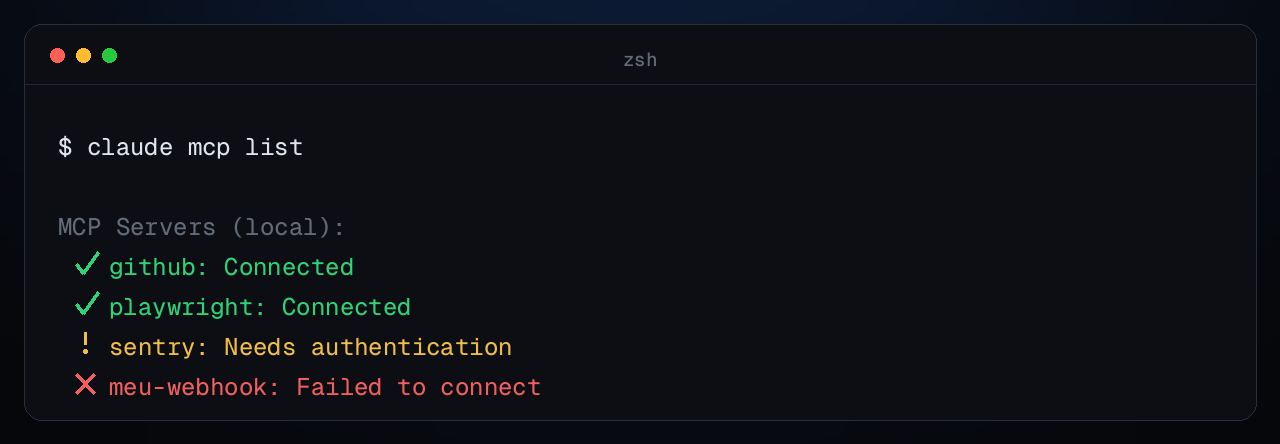
Step 5. Check that it worked
From the terminal, outside a session, run:
claude mcp listYou will see each server with a status.
MCP Servers (local):
  ✓ github: Connected
  ✓ playwright: Connected
  ! sentry: Needs authentication
  ✗ my-webhook: Failed to connect
What each one means:
- ✓ Connected. All good, Claude can use it.
- ! Needs authentication. You still need to authorize it (see below).
- ✗ Failed to connect. Wrong URL, server down, or an invalid token.
Inside a session, the /mcp command opens a menu to see the tools, authenticate and check the status.
/mcpIf the server asks you to sign in (OAuth), this is where you pick Authenticate. The browser opens, you approve, and the status turns to Connected.
Handy day-to-day commands
# list everything
claude mcp list

# see the details of a server
claude mcp get github

# remove
claude mcp remove github

# import servers you already have in Claude Desktop (macOS and WSL)
claude mcp add-from-claude-desktop
The 3 most common slip-ups
1. “No MCP servers configured” out of nowhere. You added the server in the local scope inside one project and opened Claude in another. The fix is to use the user scope, which applies everywhere, or add it again in the right project.
2. “Failed to connect”. Almost always it is the URL or the token. For an HTTP server, test the URL with curl -I <url>. For a local server, run the command after the -- directly in your terminal and read the real error. If it is just slow the first time, raise the timeout with MCP_TIMEOUT=60000 claude.
3. You edited .mcp.json and nothing changed. Claude reads this file only when the session starts. Exit with /exit and open it again.
In short
Connecting a tool to Claude Code is a single command line. You choose the scope, paste the address, check with claude mcp list, and you are set. From there Claude stops being an isolated assistant and starts acting on the tools your company already uses.
This is exactly the kind of link that turns a piece of curiosity into automation that saves hours every week. If you want, we will map this out for your business and hand it to you running.
Frequently asked questions
What is MCP in Claude Code?
MCP stands for Model Context Protocol. It is a standard that lets Claude use external tools directly, such as GitHub, Notion or the browser, without you copying and pasting information back and forth.
How do I add an MCP server in Claude Code?
Use the claude mcp add command with a name and the server address. For a hosted server: claude mcp add --transport http name https://server-url. Then check it with claude mcp list.
What is the difference between the local, project and user scopes?
Local applies only to you in this project. Project lives in a .mcp.json file at the root and goes into Git, so it applies to the whole team. User applies to you across every project on the machine. On conflict, priority is local, then project, then user.
Why do I see Failed to connect when I list the servers?
It is almost always the wrong URL or token. For an HTTP server, test the URL with curl. For a local server, run the command after -- directly in the terminal to see the real error. If it is slow on the first connection, raise the timeout with MCP_TIMEOUT=60000.
Is it safe to keep the token in the .mcp.json file?
No. Since that file goes into Git, never write a real password or token in it. Keep the token in an environment variable and reference the variable instead of writing the value.
Frota AI
Want this running in your company without setting anything up?
We build the right automation for your business and hand it to you working.
Book an assessment →